Ever wonder how a properly secured load ends up scattered across the highway? It’s often caused by misjudged angles, under-spec chains, or poor tensioning rather than bad driving.
At RUD Australia, we make lashing solutions that are tested to meet Australia’s strict strength and durability standards.
These standards don’t give you much room for error, so your setup needs to match the risks of moving heavy goods on our roads.
That’s why we’ve made this guide. It explains grade 70 chains, how angles impact lashing capacity, what to check in products, and why tensioning and quality are key. You’ll leave this guide ready to ask suppliers the right questions.
First, let’s clear up what “chain grade” means.
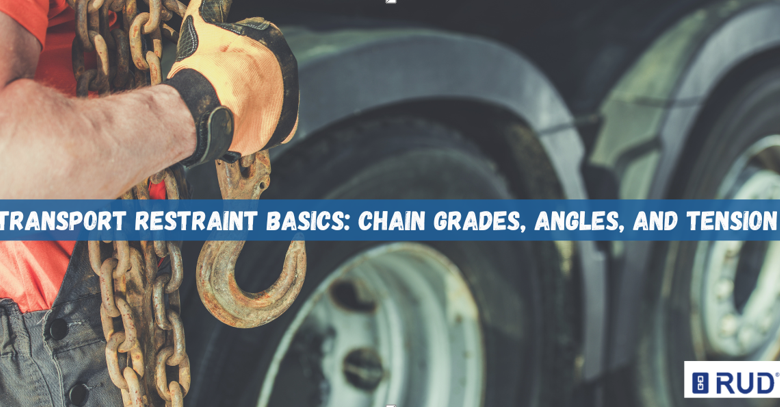
What Does Chain Grade Mean?
Chain grade shows the tensile strength of your lashing chain. You can think of it as a rating for how much force the chain takes before snapping. Once you understand the grade, you can pick the right chain for your transport job.
Common Grades and What They’re Good For
Each grade serves a different purpose. Here’s what works best for different situations.
- Grade 30: You’ll want to avoid this one for on-road restraint work. The forces during transport are simply too much for it to handle safely.
- Grade 43: Light-restraint jobs are where this grade stands out. It handles lighter cargo well, though you shouldn’t rely on it when you’re hauling heavy loads.
- Grade 70: Most transport operators treat this as their go-to standard. You get solid strength and stay compliant with Australian regulations at the same time.
- Grade 80/100: These industrial-grade options pack more strength than regular transport work needs. Only reach for them when your specific load actually demands that extra capacity.
Most trucking operations stick with grade 70 because it balances strength with practicality. Going higher will just cost you more without making your standard loads any safer.
Choose for Fit
Now, just because a grade number is higher doesn’t mean it works better for what you’re doing. You need to match it to how heavy your load is, how much friction you’re working with, and where your tie points are.
But watch out for costly choices that sound good but aren’t useful. Instead, always check the working load limit (WLL). That’s the number that shows what the chain can really handle when you’re out on the road.
Markings, Maintenance, and Safety Margins
Before you buy any chains, look for Australian-compliant labels that confirm they meet local standards. Once you start using them, check regularly for stretching that changes the chain’s capacity.
You’ll also want to watch for visible wear or rust that eats away at the metal over time. If you’re not sure a chain is safe, it’s better to replace it. After all, taking a chance on safety isn’t worth it on the road.
But even a tough chain can fail if it’s not set up correctly.
See also: Logitech MX Master 4 Debuts as World’s First Haptic Feedback Mouse
How Restraint Angles Impact Lashing Capacity and Safety
You might pick the perfect chain grade, but if you position it at the wrong angle, you’ll lose most of your holding power.
The angle between your lashing and the loading deck directly affects how much force actually gets applied to your load. Even a solid grade 70 chain can start losing effectiveness once your lashing angle drops below 30 degrees.
The maths here is pretty straightforward. At a 90-degree angle, your lashing delivers 100% of the chain’s rated capacity. Once you drop down to 60 degrees, you’re only getting about 86% of that strength. Push it down to 30 degrees and you’ve suddenly lost half your holding power or more.
What to Do if You Can’t Get the Best Lashing Angles
Your tie points or the shape of your load won’t always let you hit those perfect angles. But you’ve got a few ways to work around it.
- Use more lashings: Adding extra chains compensates for what poor angles cost you. In fact, you’d need four lashings at 15 degrees just to match the clamping force of a single one at 90 degrees.
- Choose a stronger chain grade: You can also move up to grade 80 or 100 and bring back the strength you’re losing. This grade works particularly well when your tie points force you into awkward positions.
- Adjust tie-down positions: Sometimes the solution is simple. Shift your anchor points, and you’ll see the geometry change entirely. After that, moving a mounting bracket even a few inches can improve the angles and increase holding strength.
The Load Restraint Guide 2025 has tables for these calculations. Those resources show exactly how many lashings you need for your angles and load weight.
Pallet Angles and Measuring Your Setup
There’s another angle issue that doesn’t get talked about enough: pallet angle. It spreads downward force across your load. High-quality pallet angles distribute force evenly instead of concentrating it in one spot. This prevents crushing and stops chains from cutting into edges.
Ensure Safe and Effective Load Restraint
Ready to optimise your load restraint?
It’s easy to overlook how much the chain grade, angles, and tensioning affect safety, but now you know better.
So, start with these checks:
- Pick a chain grade that can handle your load.
- Next, make sure your angles sit above 45 degrees or adjust them as needed.
- Once that’s done, lock in the tension.
- Finally, check your hooks, pallet angles, and edge protection to be sure everything’s secure.
Over time, your gear will start to show wear and tear, so keep an eye on it. If you spot stretching, rust, or damage around the hook’s throat, it’s time for a replacement.
And when you’re unsure how to get all these parts working safely together, contact RUD Australia for guidance on load restraint setups.